| Summary: Turn off the pump and automatic controls, release trapped pressure through the filter air-relief valve, and open the housing only after it is fully depressurized. Rinse the cartridge pleats with a garden hose, clean loose debris from the tank, and inspect the cartridge and seals. Reassemble correctly, restart carefully, and check for leaks. Use the service procedure for your exact filter model. |
Cleaning your pool cartridge filter regularly helps maintain strong water circulation and keeps your pool water clear. This guide walks you through safely removing, rinsing, and inspecting the cartridge, along with knowing when it needs a deeper clean or replacement.
When Should You Clean a Cartridge Pool Filter
Use the pressure gauge and return flow as your main indicators. With the pump running normally and the cartridge clean, record the pressure; this is your clean baseline. As a common rule of thumb, clean the cartridge when pressure rises about 8 to 10 PSI above that baseline. Filter designs differ, so check the guidance for your model—such as Pentair Clean & Clear or Hayward SwimClear—if it specifies a different cleaning point. Do not wait for circulation to drop sharply before servicing the filter.
Tools to Have Ready
- Garden hose with a flat-fan spray nozzle (avoid a tight pinpoint stream)
- Protective gloves and eye protection
- A clean place for the cartridge to drain
- Soft brush or cloth for accessible tank surfaces
- Replacement tank O-ring if the existing seal is damaged
- Pool-filter-compatible silicone lubricant, if needed
- A cartridge cleaner only if degreasing is necessary and approved for your filter
Use a garden hose to rinse the cartridge. Avoid pressure washers, which can damage the pleated media.
How to Clean a Pool Cartridge Filter
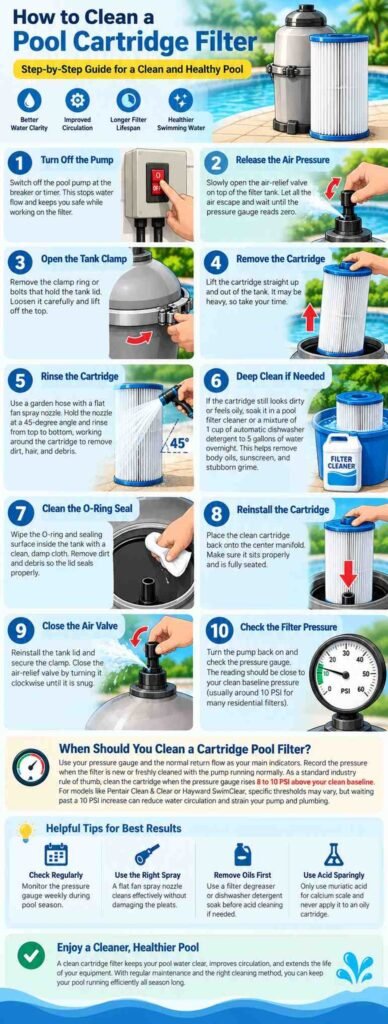
Step 1: Shut the system down
Turn off the pool pump and automatic controls that could start it unexpectedly. Use the proper shutdown method for your equipment. Never open a filter tank while the pump is running.
Step 2: Release trapped pressure
Open the filter air-relief valve and use the drain fitting as directed for your model. Wait until the pressure gauge reads zero and air or water is no longer escaping under pressure. If the gauge appears faulty or does not return to zero, stop and have the system checked.
Step 3: Open the filter housing
Release the clamp, lock ring, or lid using the correct opening sequence. Do not strike, pry, or force stuck hardware. Never loosen a clamp or lid while the tank is pressurized. If parts are damaged or corroded, get professional help.
Step 4: Remove and inspect the cartridge
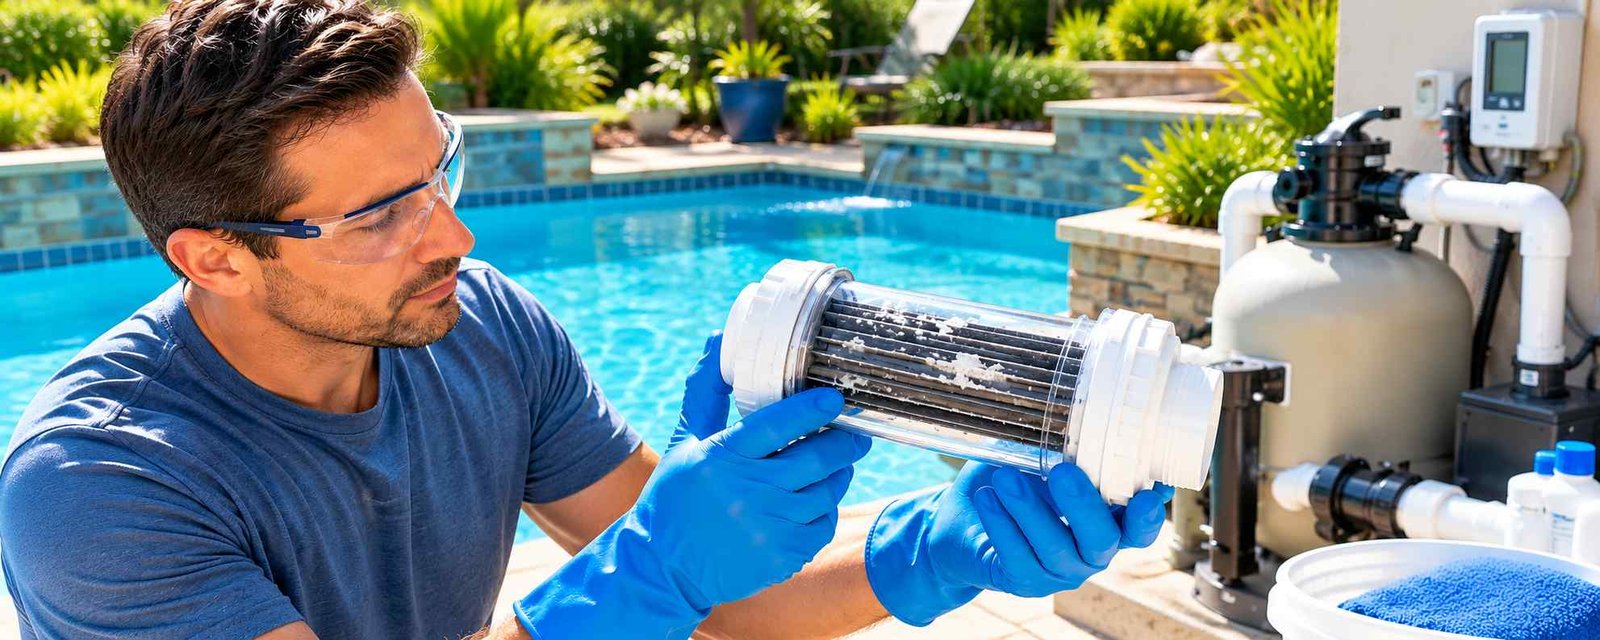
Lift the cartridge out carefully. Look for torn pleats, flattened areas, oily film, embedded debris, mineral deposits, cracked end caps, or a damaged center support. A cartridge with damaged media may need replacement rather than another cleaning.
Step 5: Rinse between the pleats
Starting at the top, hold the hose nozzle at roughly a 45-degree angle and rinse systematically around the cylinder. Direct the fan of water between the pleats to flush out trapped dirt, hair, and other debris. Rinse both the outside and inside, turning the cartridge as you work.
Step 6: Degrease and deep-clean when needed
If an oily film from sunscreen or body oils remains after rinsing, use a dedicated pool-cartridge degreaser that is compatible with your filter media. Follow the product label for dilution and soak time, then rinse thoroughly. Do not use a homemade detergent soak unless the filter manufacturer specifically permits it. Only consider an acid treatment for persistent mineral scale when the filter maker allows it, and only after oily residue has been removed; use the specified product, dilution, and procedure.
Step 7: Clean the tank and inspect the seal
Remove loose debris from the tank and rinse the interior. Wipe the sealing surfaces clean. Inspect the tank O-ring for cracks, flattening, stretching, or other wear, and confirm it sits correctly in its groove. If lubrication is needed, use a pool-filter-compatible silicone lubricant; petroleum-based products can damage some seals.
Step 8: Reinstall the cartridge and close the tank
Seat the cartridge on its support or manifold. Refit the internal pieces in their correct positions. Make sure the O-ring sits evenly and the lid or clamp is aligned. Secure the closure using the specified method; do not overtighten or improvise with tools.
Step 9: Restart and check for leaks
Keep people clear of the filter during restart. Open the air-relief valve as directed, start the pump, and let trapped air escape. When a steady stream of water appears, close the valve. Watch the tank, clamp, drain, and connections for leaks. If the tank shifts, leaks, makes unusual noises, or pressure behaves abnormally, shut the system off and get help.
Step 10: Record the clean pressure
Once circulation is stable, record the pressure reading. This gives you a baseline for the next cleaning. Also check that return flow looks normal and that the pump and skimmer baskets are clear.
How Often Should You Clean the Cartridge
Let pressure, circulation, pool conditions, and the filter maker’s guidance determine the schedule. Heavy swimming, windblown debris, pollen, nearby trees, algae treatment, or oily contaminants can shorten the time between cleanings. A calendar reminder can help, but pressure and flow are better indicators than a fixed monthly rule. For a complete routine covering the rest of your pool, use the pool cleaning and maintenance guide.
Common Mistakes to Avoid
- Using a pressure threshold that does not match your model.
- Using a pressure washer on pleated media.
- Applying acid or other chemicals without confirming they are suitable for the cartridge and the type of deposit.
- Forcing a clamp, lock ring, or lid that will not open or seat correctly.
- Reinstalling a damaged cartridge or worn O-ring.
- Restarting without checking the air-relief valve and looking for leaks.
When Should You Replace the Cartridge
Cleaning cannot repair torn pleats, broken end caps, a damaged center core, or media that has permanently lost its shape. Replacement may also be appropriate if the cartridge clogs again quickly after a thorough rinse or no longer restores normal flow. Match the replacement part number and dimensions to your filter model before buying.
Frequently Asked Questions
Can I clean a cartridge filter with just a garden hose?
Yes. A careful hose rinse is the right first step for ordinary dirt and debris. An oily film or stubborn deposits may require a compatible filter cleaner or a replacement cartridge.
Can I use a pressure washer on a pool cartridge?
No. Use a garden hose with a fan spray instead.
Should I use muriatic acid to clean the cartridge?
Not for routine cleaning. Acid may be suitable for hard mineral scale on some cartridges, but only when the filter manufacturer permits it. Remove oily residue first and follow the specified treatment procedure; if you are unsure, use a pool professional.
Why is the filter pressure still high after cleaning?
Check that the cartridge is seated correctly and the pressure gauge works. Inspect the pump and baskets for blockages, confirm valves are in their normal positions, and consider whether the cartridge is worn or undersized. Persistent high pressure or weak circulation needs further troubleshooting.
Can I run the pool without the cartridge installed?
Do not operate the system with the cartridge removed unless the equipment’s approved service procedure specifically calls for a controlled test. Incorrect operation can create equipment and water-quality problems.